The Add-ins files may be placed anywhere on your hard disk.
One procedure is to create a directory (or folder) entitled "jensen.lib" and
place it in the directory called "Add-ins" created
by the Microsoft installation program. The add-in files are
then placed in the "jensen.lib"
directory. Alternatively, the add-in files may placed in any
directory on the hard disk. It is important to put all the
add-ins in the same directory.
When you download a new version of an add-in or the entire
library, it is important that you replace the old files with
the new ones. Leaving two copies of the add-ins on your computer
will generally cause confusion regarding the add-in that is
loaded by Excel.
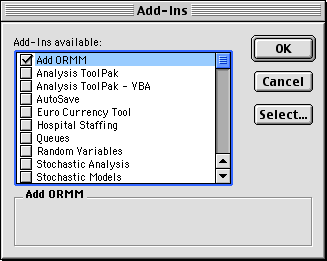
To use an Add-in first open the Excel program. Choose the "Add-Ins"
command from the Tools menu. (For Excel 2007 and 2010 a different
method is used. See below) A dialog box showing the current
list of Add-ins appears as in the figure below. Add-ins are
identified by name. A check in the box next to the name means
that the add-in is installed, while an unchecked box means
that it is not installed. If an add-in that you want does
not appear in the list use the Select... or Browse... button
to move to the directory in which the ORMM add-ins are stored.
The most convenient way to use the ORMM add-ins is to first
install the Add ORMM add-in. All the others can be installed
from the dialog box of the Add ORMM add-in.

When any one of the ORMM add-ins are installed a new menu
item, OR_MM, is added to the Worksheet menu. The OR_MM
menu lists references to Visual Basic programs provided
by the add-in. Selecting any one of these produces a dialog
box that accepts additional information required by the
program.
In addition to the programs reached through the menu,
an add-in may provide new functions that are listed as
User Defined Functions in the Excel function list.
These functions are used just like the normal built in
functions of Excel. |


